as the holiday season is fast approaching and for the procrastinators out there in need of a quick gift idea for someone who enjoys cooking....
i use to have random sheets of recipes scattered about my apartment. when i cooked with a recipe that i tore out from a magazine, the article would become spattered with all the ingredients from the recipe. {oops}.
solution? the best thing i found was to place the recipes into binder sheet protectors. this allows you to protect the recipes from the occasional spatter. and, if a little oopsie occurs, wiping with a damp cloth takes care of it! with clear view binders, you could put in a myriad of beautiful colorful papers that can match any kitchen! here is one that i made for a friend as a bridal shower gift...
so, to make this lovely and personalized gift, you can buy:
- a packet of sheet protectors
- 1 inch binder that has clear view pockets that allows you to place in sheets of paper in the front/back/spine
- few sheets of pretty scrapbook paper that coordinate with your gift receiver's kitchen (buy at local crafts store)
- letter stickers
- 1 sheet of plain scrapbook paper
- few of your favorite recipes
instructions:
1. measure out size of paper that fits into the clear pockets/spine {if needed-create a template paper - and make sure it slides into the clear view pockets before you start cutting your pretty scrapbook paper}
2. using a paper cutter, cut the pretty scrapbook paper to size
3. insert pretty scrapbook paper to back/spine
4. cut "recipes" background on plain scrapbook paper to whatever size you prefer using your paper cutter
5. stick letter stickers onto the plain scrapbook paper {i just put the word "recipes", but you could personalize it with the person's name}
6. glue "plain scrapbook paper with the stickers" onto the "front page of the pretty scrapbook paper" with a glue stick
7. insert this sheet into the front of the binder
voila! a personalized practical and handy recipe book that will be used for years to come. i use it frequently in my kitchen and find it quite indispensable. if you have any questions, leave me a comment. hopefully, someone will enjoy this gift as much as i have!
Sunday, December 13, 2009
Friday, December 11, 2009
{mom's apple cake from the smitten kitchen}
i was chatting with my long-time friend lydia about ideas for thanksgiving desserts and she shared with me that a friend of hers recommended a famous recipe by the smitten kitchen blog. now that is one great blog with an amazing following!
the recipe was called "mom's apple cake". there were hundreds of raving reviews about this recipe so i had to try it out. anything with the word {mom} in the recipe makes me want to give it a whirl in the kitchen...
{ok, i have to share how much i love that i learned how to post these larger pictures for my blog!! yay! its almost like you can eat it off the blog page!}
overall, i have to agree that it is a delicious cake and a great dessert for thanksgiving. baked apples? cinnamon? coffee cake base? mm..lovely combination. the cake was very moist and flavorful and tasted delightful when it was warm and right out of the oven. and while it was baking in the oven, {the smell} was just. heavenly. my only qualm, because i tend not to enjoy super sweet desserts, was that the dessert was super sweet. i couldn't get a good sense of whether the guests really loved it or were just polite. heehee. if i would make it again, i would definitely cut the sugar by half or at least to only about 1 1/4 cups. and, since the tube pan that i had ordered from amazon to make the apple cake was sitting all lonely, locked in my apartment building's front office on thanksgiving day, i decided to pour most of the batter into a springform pan and small amount of it into a loaf pan out of uncertainty as to how high the cake would rise, it turned out just fine as you can see from the pictures. all of it would have fit nicely into the springform pan.
here is the recipe below. depending on your love for sweets, adjust the sugar accordingly in the batter :) enjoy!
Mom’s Apple Cake (recipe link from the Smitten Kitchen)
6 apples, Mom uses McIntosh apples
1 tablespoon cinnamon
5 tablespoons sugar
2 3/4 cups flour, sifted
1 tablespoon baking powder
1 teaspoon salt
1 cup vegetable oil
2 cups sugar (like i mentioned above, the dessert was sweet to me, so if i was going to make it again, i would cut it to either 1 1/4 cup or 1 cup)
1/4 cup orange juice
2 1/2 teaspoons vanilla
4 eggs
1 cup walnuts, chopped (optional)
Preheat oven to 350 degrees. Grease a tube pan. Peel, core and chop apples into chunks. Toss with cinnamon and sugar and set aside.
Stir together flour, baking powder and salt in a large mixing bowl. In a separate bowl, whisk together oil, orange juice, sugar and vanilla. Mix wet ingredients into the dry ones, then add eggs, one at a time. Scrape down the bowl to ensure all ingredients are incorporated.
Pour half of batter into prepared pan. Spread half of apples over it. Pour the remaining batter over the apples and arrange the remaining apples on top. Bake for about 1 1/2 hours, or until a tester comes out clean.
{would i make this again? yes}
Thursday, December 10, 2009
{new design}
hello readers, as you can see, i have decided to use my new blog site design for this website. keeping up the two blogs seemed...well, senseless. so, with the new and coming year, i figured, why not change the site with a little more freshness...
Tuesday, December 8, 2009
{Grandma Louise's Tomato Sauce from Chef Academy}
have any of you watched the new bravo tv show-Chef Academy? the show features a renowned Michelin award-winning Chef Novelli, who opens a culinary academy in Los Angeles that teaches/trains aspiring cooks to cook like professionals {would love to learn how to cook like a professional!}. it is not a competition perse, but, if the students {major characters} fail 3 challenges, they then fail the academy. anyways, the reason i enjoy watching the show is because each episode, Chef Novelli briefly demonstrates a classic technique/recipe or cooking method.
the one episode that caught my attention was "Grandma Louise's Tomato Sauce". i've always wanted to know how to make a kick-butt tomato sauce. honestly though, i've never even thought of trying it, especially with inexpensive jars of tomato sauces available at the market in every imaginable flavor. i did venture once to try and make it with canned tomatoes--it turned out ok, but not better than the ready-made sauces. but, since i've been married, i've been made aware that my husband has a mild aversion to jarred tomato sauces {wah?!}. in all fairness, the acidity of the tomato sauce is sadly reminiscent of a bad bout of gastroenteritis. {share too much? heehee. eeew...} anyways, so my quest has been to find a way to make a tomato sauce that he enjoys since i want to make my husband's tummy happy and also because i personally adore tomato based foods. hence, i decided to try and make this tomato sauce. as you can see from my photo of the dish below, it has a deep, rich color with chunks of tomatoes. mmm....now how good would that be over a plate of pasta?
My personal thoughts on the recipe: it is actually more expensive to make this tomato sauce from scratch compared to the jars without question {3 dollars for a jar on sale versus 6 dollars for just the tomatoes (excluding the anise/vanilla/basil)--although maybe i paid too much for the tomatoes at trader joe's}, i only used 2 anises since i'm not a super fan of licorice-y foods, i used vanilla bean paste since it is less expensive instead of a fresh vanilla bean, and added 2-3 chile pods for spice. The flavor is quite intense and one must be patient for it to develop into that paste-like consistency {1.5 hours!}. my sauce ended up being a little bit tart in the end, so i probably should have added more sugar for balance.
the wonderful thing about the sauce is not only the multiple layers of flavor with the anise, vanilla bean, chile, garlic, and basil, but the incredibly intense showcase of the tomato. {it sings tomato} ultimately, i felt like the sauce was quite lovely and am willing to make it again, with a couple more tweaks.
making a tomato sauce from scratch? {check!}
The link for the recipe is here; Grandma Louise's Tomato Sauce
The Original Recipe for "Grandma Louise's Tomato Sauce" {with my side commentary}
Ingredients:
6 lb (2.7 kg) Beef or Heirloom tomatoes
4 Star anise {i only used two}
1 Vanilla pod {used vanilla bean paste-purchased at Sur La Table}
Sea salt & cracked black pepper to season
White sugar
2 Sprig fresh thyme
1-2 Bay leaves
{i added 2 dried chili pods}
Infusion:
Fresh garlic
28gm bunch fresh basil
Extra virgin olive oil
DIRECTIONS
1. Place a heavy cast pan to heat up.
2. Wash the tomatoes and halve roughly.
3. Place into the hot pan and season with salt, pepper and a touch of sugar.
4. Add the anise and vanilla.
5. Allow the tomatoes to start to cook then press them gently with a masher to help them to release their juice.
6. Reduce the heat down to just simmering and continue for about 1-2 hours until a thickened paste. This slow evaporation of the moisture from the tomatoes will produce a deep color concentrated flavor without any bitterness.
7. Crack the garlic and add along with the basil which is just halved and throw in.
8. Combine with the warm paste and finish with a good amount of olive oil to finish the infusion. Allow to cool before storing ready for use.
NOTES
• If you have added too much sugar to start this can be balanced out with a touch of vinegar.
• Always taste the tomatoes uncooked to determine their natural sweetness before you add the sugar.
• The amount of garlic to infuse with greatly depends on its strength; again make your own judgment.
• Additional seasoning such as cumin, fennel seeds, chili etc can be added this is of course personal taste again.
Monday, November 30, 2009
{Newton's Fruit Crisps {Apple Cinnamon} - Snack Review}
I adore these as snacks. I always have a couple stashed away somewhere in my snack bag/backpack. The great thing is the crispy outer shell. I love the crunchiness {crunch crunch crunch} and the perfect amount of apple cinnamon filling that is not too sweet. I always found the nutrigrain bars to be waaay toooooo sweet. (obviously personal taste opinion). The other great thing about the snack is that its only 100 calories...
Now the caveat to this snack - not filling! I could eat a few packs in one sitting, hence eliminating the low calorie benefit. heehee.
Give it a try and let me know what ya think!
Tip: Buy it at Target! Cheaper than the sale price of grocery stores...at least in SoCal...
Sunday, November 22, 2009
{Juicy Asian T Bone Steak}
I'm a steak and potato lover. I could eat a steak and potato meal at least once a week. Drooool. How I adore slicing into a large piece of steak that is juicy, tender and full of flavor... and then scooping into a hot and buttery salted baked potato. oooohhh....soooo good. I could eat one again right now.
This recipe is an Asian-flavored T bone steak, especially with the sweet soy sauce and green onion based sauce. I love how tender the steak is because of the time spent pounding out the meat with the tenderizer (got stress? this recipe is for YOU!). Now if you notice from the picture, the recipe is slightly modified. Instead of green onions, I used regular onions this time since I ran out of green onions. Also, I added to the sauce an aged balsamic vinegar (which I reduced). Not sure which I like better. The tangy sweetness from the balsamic vinegar is nice and more reminiscent of an American type steak than an Asian style steak. Whatever suits your fancy....But the recipe below is for the Asian-flavored steak sauce.
Steak
1. Pound out your stress on the T-bone steak with a meat tenderizer
2. Rinse the steak off with water and pat dry
3. Season with black pepper and salt
4. Mix 1/4 teaspoon baking soda and 1/4 cup water. Pour over the 4 steaks in a pan.
5. Fry the steaks in a pan with olive oil
Sauce (can use a separate pan if you would like or scrape off the yummy steak pan bits that you used earlier)
1. Chop green onions
2. Saute in olive oil
3. Add 2 T soy sauce
4. Add 1/4 cup water
6. Add 1 T sugar
After fry steak, let the steak rest before slicing it to allow the juices to be absorbed back into the meat. Drizzle the sauce over the steak when ready to serve
Tuesday, November 3, 2009
Anniversary
My husband and I just celebrated our 1 year anniversary. Yay! What a quick and wonderful year it has been for both of us! In celebration, we each separately planned parts of the day. For lunch, I planned a little pseudo-picnic on our patio. I layed out a beach blanket, topped it with some seat cushions, used some boxes and covered with it with some fabric, few candles, music...voila! Pseudo-picnic! Why did I have it on our patio? Well, because....food....is...important. I felt like the food would have been compromised if I packed it into a basket. Silly me! :) I ended up making lobster roll sandwhiches, roasted fig, gorgonzola, and arugula salad, and brie cheese with crackers. I didn't take any pictures...why oh why! I actually loved the roasted fig salad and will definitely make it again. The lobster roll was wonderfully reminiscent of Maine. After eating, we exchanged our gifts and read our mushy love notes to each other (ahhh...my readers must be rolling their eyes..haha). At night, my hubbie took me to a spanish tapas restaurant in Long Beach called Sevilla (review later with no pics since it was really dark in the restaurant) and then we rented a movie and snuggled on the couch. Being married to my husband is absolutely wonderful and am looking forward to many more years ahead!
Lobster Roll Sandwiches
- Asian white bread - toasted. Smear with a little bit of butter. Sprinkle with garlic powder. (this is what i thought would become compromised if I packed it. Bread would not be nice and toasty and warm!)
- Freshly steamed lobster, chopped into moderately sized pieces
- A tiny spoonful of mayo mixed into the lobster
- Fresh pepper
Roasted Fig, Gorgonzola, and Arugula Salad
- Organic Arugula from Trader Joe's
- Gorgonzola cheese from Trader Joe's
- Fresh black mission figs
- 18 year aged balsamic vinegar (My favorite is Oliver's brand from Sam Clemente)
- Dark Brown Sugar
- Olive oil
1. Chopped off tips of figs and sliced in half
2. Drizzled figs with olive oil, black pepper, balsamic vinegar
3. Sprinkled tops of figs with dark brown sugar
4. Roasted in oven at 350 degrees for 10-15 minutes
5. Set out to cool
6. Lay figs on top of arugula salad and sprinkle with gorgonzola cheese
7. Dressing: Balsamic vinegar, Olive Oil, Salt, Pepper, A little mustard for binding the vinegar and olive oil
Friday, October 30, 2009
Marche Moderne Review - South Coast Plaza
I was wandering through South Coast one day and stumbled upon this cute restaurant located upstairs, near the Nordstrom Department store. I took a peek at the menu out of interest and the tasting menu caught my eye. $20 for 3 delicious sounding courses. So, when I arrived home, I performed an internet search to see what reviews existed about the restaurant. Generally, really great reviews and people felt that it was a well-valued meal.
I was meeting a friend who was pregnant to look for some maternity clothes (fun!) and decided to meet there for lunch. After much debate, we decided to pass on the tasting menu since it didn't sound as appealing that day (the tasting menu changes daily) and not to mention, its hard to justify in my mind to spend that much for just lunch. We decided on sharing the "Cured & Homemade Teriyaki Confit Pork Belly with Chinese long beans, demi-glace a l'orange, and star anise jus" off the "Unusual" category of the menu and the "Merguez Sausage and Shrimp Tart with Fennel and Caramelized onion jam, Mint, and Fennel greens with an Emulsion of Cumin-Harissa" under the "wood-burning oven tart" category.
The pork belly was...okay. It reminded me of something my mom cooks on occasion, except, not as tender and delicious. The pork belly was a little bit dry/firm around much of the edges with a few small areas of really tender meat. It was flavorful but nothing special, nothing amazing. I'd prefer mom's pork belly any day because its not as pricey! haha. Moving on...
The tart -- well lets call it what it was...it was a small pizza cooked in a wood-burning oven. The pizza had bold Mediterranean flavors. The sausage was likely lamb based so you'll have to like lamb with mediterranean spices. The shrimp in my mind, was a bit weird for a pizza topping, although it was well seasoned and tender and a good size. I know shrimp exists as a pizza topping and some people love it, but it just confirmed in my mind that its not my cup of tea....Although I was only sharing half of the small pizza with my friend, I could only eat about 2/3 of my piece before my palate was just overwhelmed and I could not swallow another bite. We both agreed that the dish was definitely not something we could finish off by ourselves because of the heavy flavors and were glad that we shared it.
To finish it off, I ordered 1 rose-flavored macaroon. I was still on my macaroon kick and it looked so cute in the jar from afar. i knew ahead of time that there was no way I could fall in love with this macaroon because flower-flavored food does not fit my idea of yummy, but, I felt like, why not give it a try despite my mild aversion. Why an aversion? Flower-flavored foods remind me of eating perfume/soaps...hehe. Anyways, thankfully it was lightly scented rose, so it was ok. The filling was nice. But I wouldn't order it again...(completely personal preference).
Bottom line-Would I eat there again? Maybe...I would try some other dishes (tasting menu). I'm willing to give it a second chance because its not that the food was bad...it just wasn't amazing for the price...but I am open to the fact that maybe we chose the wrong dishes.
Warning: Pork belly and Tart appear larger than actual size.
WHAHAHAHHA!
Labels:
marche moderne,
pork belly,
review,
south coast plaza,
tart
Monday, October 19, 2009
Carving Pumpkins!
Don't you just love the fall season? The pumpkins fill the fronts of stores, spiced cider bottles are on the grocers shelves, maple cookies, pumpkin pies....love it......This past weekend, the in-laws, my husband and I spent a crisp evening out on the patio carving pumpkins. I have to say, my hand was deformed like the claw-hand from Liar Liar with Jim Carrey for the rest of the evening, but well worth the final product. My brother-in law carved Jack, the Nightmare before Christmas, the hubster carved the boy in the bed, the sister-in law carved the little monster (the cutest!), and I carved the haunted house. Thank goodness for pumpkin carving tools. Pumpkin meat was flying all over the place with my carving style (i'm talking on the glasses, down the shirt, across the table), and hence, a good reason why I am not a surgeon. Heehee! After we carved our pumpkins, we sprinkled the insides generously with cinnamon, lit the candles, and ahhhhh.....it smelled like.....Pumpkin Pie........delightful....
The best part of it all, was that it was reminiscent of the second date I went on with my husband before we were married. He planned this wonderful date where we picked pumpkins from a pumpkin patch and then went to his place and carved pumpkins. Good times....
I think we'll have to maintain this as a yearly family tradition
Thursday, October 15, 2009
Turkey Avocado Panini with a Spicy Lime Butter
Recipe a la Natalie C
One day, after a difficult morning, I called a colleague to see if she wanted to have lunch and commiserate. She was making lunch so she kindly invited me over. Well, needless to say, I was impressed! I loved the lunch so much, I figured I would make it again at home and blog about it! It is a quick and easy go-to lunch when you have nothing to eat. The best part of the panini is the spicy lime shallot butter, which is so easy to make and versatile since it can be used for many other things, such as fish (aka Dinner! yay!). So whip up some of that butter and store it in your fridge for other meals. Multi-tasking at its best!
All I did was visit my local favorite grocery store, Trader Joe's - Bought a bag of shallots (1.49), a bag of soft Hass avocados (around 3 dollars), Panini bread (3.29), roasted turkey breast (4.79), one lime (.29). With all of that, I could feed a few people, so its a much cheaper then heading over to Panera's where you're easily spending 10 dollars a person for lunch.
Once you smother on that butter over the panini bread and either toast it in your toaster oven or press it in the panini grill, you'll find that the bread develops this wonderful rich flavorful from the butter and has this lovely warm and toasty crunch when you bite into it. The avocado adds a wonderful additional layer of creaminess and depth, so be generous when you layer it on your panini (Natalie C added the avocado on both sides of the panini). Add a little side salad that is lightly dressed in a vinagrette (I'm currently loving the Ken's Steakhouse Lite Asian Sesame Ginger and Soy Dressing over Romaine lettuce and few diced green onions) . Voila. Perfect and easy lunch!!
Spicy Lime Shallot Butter
- 4 Tablespoons Room Temperature/Softened butter
- Few sprinkles of red pepper flakes
- Zest of one lime
- 1 tiny spoon of fresh lime juice
- 1/2 chopped shallot
- 1/4 teaspoon salt
Turkey Avocado Panini
1. Smear the Spicy Lime Shallot butter over the sliced panini bread
2. Toast in toaster oven until golden brown
3. While toasting, slice up the avocado
4. Once panini bread is done, layer on the turkey meat
5. Add sliced avocado
6. Eat away!!! *crunch crunch crunch*
If you plan to use a panini grill,i would toast the bread first, butter side up, even before you use the panini grill to toast up the butter side of the bread. Then add the turkey meat and press it on the grill. THEN add the avocado after you take the sandwhich off the grill...hope that makes sense....I was too lazy to take my panini grill out of the cabinet...hence, the toaster oven version. :)
Labels:
panini,
Sandwhiches,
spicy lime butter,
turkey avocado panini
Sunday, October 11, 2009
Coconut Banana Bread with a Lime Glaze
This recipe/picture was 110% inspired by a wonderful foodblog that I discovered several days ago, called kissmyspatula. The recipe was for a Hurricane Ridge Banana Bread. Its made of a ripe bananas, toasted coconuts, toasted walnuts, and rum...drizzled in a lime syrup. It sounded so delightful that I had to give the recipe a whirl. Not to mention, the pictures of the bread was so beautiful that it inspired me to try and take better artsy food pictures for my blog. (what do you think? a little artsier? haha...ok i'm working on it...) So this entry is completely to her credit since why mess with perfection?!
As I was baking this bread, my beautiful American Eskie eagerly sat by the kitchen, waiting for it to come out of the oven. When I pulled it out of the oven, she looked at me wistfully, "please, just one bite", i could hear her thinking... She's a smart dog! She knows what smells delicious! Of course, I gave her a bite of the bread, which she scarfed down, but everyone else in the house loved it just as much, leaving me with only a total of two bites!
The only thing I did different from her recipe was that I baked them in these mini loafs, which I thought would be superfun and supercute to give as gifts. Because of that, I dropped the oven temperature to about 325 and baked it for only 25-30 minutes. In terms of my little tips from baking the bread -- watch carefully when you toast the coconut/walnuts...I burnt two batches...Second, i would add more coconut to the top of the bread to make it prettier. I'm not sure how hers came out such a lovely golden brown...mine looked more pale...but nonethess, tasted great. Following her recipe, made about 5 little mini loafs. If I was doing it again, I would double her recipe to make more!! And like she says in her post, don't even think about leaving out the lime drizzle....
For the recipe, I'll provide the link so you can see her website :)
Hurricane Ridge Banana Bread by KissMySpatula
Thursday, October 8, 2009
Black Sugar Mochi Croissants - 85 Degrees
i'm not much of a croissant lover. *gasp!* i know. Weird! Who wouldn't like that flaky butteriness? Well, me. haha. Its usually just a bit too buttery for me...My parents recently brought home a bag of pastries from 85 degrees (the new bakery rave in Irvine...i'm talking long lines at all times of the day. You'd think that they were giving their baked goods away for free by the length of the lines..i'll review this place at another time but this was the preview).
I remember scavenging around the kitchen that night for something sweet. One of the items in the bag of fun was this mochi filled croissant. Eck....I was desperate for something so I decided to just take one bite and throw it back in the bag.....Well one bite turned into a second bite until the whole thing was gone! Woot!
The croissant is coated in this sugary sticky substance, crispy on the outside, flaky on the inside, and filled with this yummy gelatinous substance that sort of reminded me of grass jelly. Its actually filled with a black sugar mochi. Did I just say black sugar? Yupyup. Annnnd, what is black sugar you may ask? Goooood question. I had never heard of such a thing! In fact, I didn't believe my parents that such a thing existed! I was thinking, black food coloring? But they said that black sugar was quite popular in Taiwan and something they would eat growing up. So, I did a little google search and apparently it IS popular in Taiwan...it is a molasses-based sugar that looks black and tastes different from regular sugar. Anyways, the mochi center probably isn't for everyone but I actually loved it. Hence the picture of more mochi croissants purchased at a second visit!
Labels:
85 degrees,
black sugar,
irvine,
mochi croissants
Sunday, September 27, 2009
Chocolate Chai Cupcakes with a Cinnamon-Spiced Vanilla Buttercream Frosting
I had some candy corn the other day and it wistfully reminded me of the fall season and of the holidays. I was craving some cupcakes and had recently seen a recipe for Chai Cupcakes online somewhere. I didn't have actual chai tea and was feeling pseudo lazy (too lazy to search for a real recipe but still craving some chai like dessert). So, I searched my cupboards and came upon a box of chocolate cake mix. Chocolate? Chai? Weird..but...hey why not give it a try?? So I decided to randomly modify the chocolate mix and substitute a portion of the water with chai concentrate. I was initially going to replace all the water with the chai concentrate (tazo) but then halfway through, had some second thoughts because I was wondering if it would be too sweet. So I did half water, half concentrate.
I felt like the cupcakes were pretty good. Chai flavor was subtle...maybe too subtle. I'm not sure if I would make it again. But, I have to say that the people that ate it all seemed to really enjoy it, despite my mumbling that it was kinda weird tasting and that I would not be offended if they did not like it before handing them one. Maybe the frosting was the key in the success....
Frosting components: (I was low in powdered sugar as well). So I only used 1/2 stick butter and 1/2 cup of powdered sugar. 1 tablespoon of good vanilla extract, 1 tablespoon of cinnamon. Blended it in the mixer until a thick frosting. Smeared the frosting on the cooled cupcakes and topped with a candy corn to make it more holiday-esque.
If you're bored or looking for a new way to use your box mix...give it a try. My conclusion is that fresh frosting is SO much better than canned frosting AND.... I need to learn how to pipe frosting...hahaha.
Kimchi Fried Rice
Kimchi - love the taste but the smell that it leaves in your breath and in your refrigerator is another story. Kimchi is a korean side dish that is made from pickled cabbage. Its spicy and veeeerrry garlicky. (There are apparently different types and spices that can be used). Anyways, when I was in high school, a group of us would hang out at Korean friend's house with a fridge well stocked with kimchi. We would always know if the fridge was opened...people would start yelling--WHO OPENED THE FRIDGE? WHY DID YOU OPEN THE FRIDGE?! hahaha.. But, the taste, well..yum! I love it. Anyways, I went over to a friend's house one day and had kimchi fried rice for the first time (yay janice!). Delicious!
We had some left over kimchi in our fridge and figured it would go really well with this beef noodle tofu soup, so we decided to whip up a make-shift version of the kimchi fried rice. All you need is some leftover kimchi sliced up, leftover rice, onions (green +/- regular) and your well on your way...
Kimchi Fried Rice
Ingredients:
- White rice
- Onions (green or regular or both)
- Kimchi
- Soy sauce
- Bibimjang Red pepper paste
- Garlic
Instructions
1. Saute garlic in a little olive oil
2. Add onions (either green or yellow or both) and saute till translucent if using yellow onions. We added both.
3. We had some leftover beef strips from another meal so we threw it in. You can leave out the meat or add spam or thick ham or any leftover meat you have. Thats what's so great about this recipe. You can throw in leftovers!
4. Add the kimchi
5. Couple swirls of soy sauce and saute everything
6. Throw in leftover rice
7. Mix well
8. We added some Bibimjang-Seasoning Red pepper paste for some spice
9. For presentation, add a few sprigs of parsley or cilantro or green onions for more color.
If you want to have an egg pancake, here are the directions below. You could place it on top or below the rice.
1. Beat 5 eggs (for 4 people)
2. Add 3 tablespoons of water. Mix
3. Salt to taste
4. Pour into flat round pan. Let it fry until cooked. Flip once.
Voila! Kimchi Fried Rice. I'm craving some now...If only I could bring it to work...Ooo the evil looks I would get if I did...hahaha.
Sunday, September 20, 2009
Almond Crunch Pretzel Recipe
Have you ever tried Auntie Anne's Almond Crunch Pretzel? That is one of my all-time favorite pretzels. I also love just a classic pretzel dipped in yellow mustard. Pretzels are so expensive though. The other day, I walked into a Wetzel Pretzel shop and checked out the price of their Almond Crunch pretzel. Over 3 dollars. A little bit too expensive for my blood. And not to mention, I actually think that the Auntie Anne's almond crunch is way better. So, my quest was to figure out how to make this pretzel. Part of this recipe is adapted from CD kitchen for the pretzel base recipe and then I created the almond crunch based on how I think it could possibly be made. If there are some experts out there, any info to correct me would be great! :)
Almond Crunch Pretzel Recipe
Ingredients:
2 T brown sugar
1 1/2 cup warm water
1 1/8 teaspoon yeast
1 1/8 teaspoon kosher salt
1 cup wheat flour
3 cups regular flour
2 cups warm water
2 T baking soda
Few spoonfuls of brown sugar
Ground toasted almonds
Instructions
1. Add 2 T brown sugar to 1 1/2 cup warm water into mixer bowl. Mix to dissolve
2. Add 1 1/8 teaspoon yeast and 1 1/8 teaspoon salt to sugar/water mix. Mix to dissolve. Wait a few minutes
3. Add mixture to 3 cups flour and 1 cup of wheat flour
4. Knead dough using mixer (or hands if you don't have a mixer) to a smooth consistency
5. Let dough rise for at least 30 minutes (I waited for a little more than an hour) or until double in size. I covered the mixing bowl with a wet paper towel (without it touching the dough itself)
6. Greased cookie sheet
7. Mixed 2 cups of warm water and 2 T baking soda in a large bowl. Mix frequently
8. Split dough into equal parts (depending how big you want your pretzels).
9. Roll into 1/2 inch twists
10. Twist into a pretzel
11. Place into baking soda bath water. Cover entire pretzel with soda bath water
12. Place onto cooking sheet
13. Let pretzel rise again
14. Bake in 450 degree oven for 7 minutes
15. While baking, melt a few teaspoons of brown sugar with a little water to create a brown sugar mixture
16. Chop/grind toasted almonds
17. Once brown sugar mixture somewhat cooled, mix in grinded toasted almonds
18. At 7 minutes, pull out pretzels and brush with an egg wash. Then add the brown sugar mixture with almonds and brush onto the pretzel
19. Place back into oven for another 3 minutes
20. Remove pretzels and enjoy the crunchy sweet pretzel
If you want regular salty pretzels...instead of adding the brown sugar/almond topping, just brush with the egg wash and bake for another 3 minutes. Remove from oven. Brush with melted butter. Sprinkle with kosher salt or pretzel salt. Dip into yellow or dijon mustard. Yummers!
For packaging idea: Rip some parchment paper. Fold in half. Tape up 2 of the remaining sides. Leave opening. Slip cooled pretzel for a makeshift pretzel bag.
Mom's Chinese Green Onion Sesame Buns (Sao Bing)
My mom makes these Chinese Green Onion Sesame buns on occasion and I love it when she does! For all of you Chinese people out there, the buns are my mom's version of Sao Bing (my own personal phonetics). We typically eat this for breakfast/brunch with a bowl of soupy rice and a bunch of sides. You can fill it with Chinese braised meat (loo niew zho) or these fried crueller sticks (yo tiao). Yummmm....
Chinese Green Onion Sesame Buns (Sao Bing)
Ingredients:
2 T. yeast
2 T. sugar
1 cup warm water
1 cup extra water
6 cups flour
2-3 bunches of green onions
Olive oil
1 beaten egg
Sesame Seeds
Instructions
1. Mix 2 T yeast, 2 T sugar, and 1 cup warm water together
2. Let rest till mixture bubbles up + rises
3. Add it to 6 cups of flour in mixer bowl
4. Add remaining cup of water to yeast mixture (so none is wasted), then add to mixer bowl (thus total of 2 cups water in mixer bowl)
5. Use mixer - Mix until dough is certain consistency
6. Cover mixer with wet paper towel (not onto the dough itself) and let the dough rest. Dough will rise about double in size
7. Mix dough again (will collapse)
8. Let dough rise again until back to double its size
9. Chop 2-3 bunches of green onions
10. Add about 1-2 T of olive oil (to generously coat the green onions)
11. Season green onions with about 1 teaspoon of salt (or to your liking)
12. Flour board
13. Take dough and split into equal parts
14. Using rolling pin, roll flat (edges should be thinner)
15. Add green onions into center
16. Fold into pocket
17. Add egg wash to top of pocket
18. Dip into sesame seeds
19. Place onto plate or baking sheet
20. Gently heat cooking pot and coat bottom pot with olive oil (low-medium heat)
21. Place sesame side of bun down into oil and fry until slightly golden
22. Flip bun onto other side
23. Add approximately cup of water to bottom of pot (water about 1/2 way up buns to sort of steam the buns).
23. Carefully watch until water boils off and bottom of bun is golden brown as well
24. Flip again in pot one more time if you want the top to be slightly crispy
25. Remove from heat and allow the buns to slightly cool down (but still warm)
26. Slice bun in half and fill with braised meat or whatever you would like
27. If using braised meat, add a few sprigs of parsley and sliced raw green onion
I will post the braised meat recipe at a later date. If it sounds too difficult, try to go to a dimsum place or an authentic Chinese restaurant on a weekend morning since they may serve something like it! :)
Isn't home cooked meals from mom the best? Chinese food is actually amazingly diverse and so delicious. Its not usually Kung Pao Chicken, Orange Chicken, or Chicken and Broccoli that most people think of when they want Chinese food. The Chinese food I eat at home is completely different! Truthfully, I occasionally will crave me a little Panda Express. But thats because most Chinese people do not make that type of food at home. At home, I'm eating homemade dumplings, delicious braised meats, noodle soups, buns, all differently flavored foods...
If I had one piece of advice that I'm trying to do now (wish I didn't wait this long!!), if you can, is to learn from your mom how she cooks and what she cooks since she has a wealth of experience, knowledge and recipes!! My goal is to learn how to cook more authentic Chinese food since that is one of my favorite foods. I want to be able to share this with my future kids and to expose their palates to the wonderful flavors of Chinese cooking.
Thursday, September 17, 2009
LaraBar Product Review - Cherry Pie, Peanut Butter Cookie, and Cherry Pie
I was watching Food Network one day and saw them featuring Lara Bars. I'm always looking for bars that I can snack on at work so I was excited. Larabar's are made of unsweetened fruits, nuts and spices and are gluten/dairy/soy free with no added sugar. They are mostly date based...so if you're not a fan of dates, this may not be the bar for you, although, it is not overpowering so worth a try. They seem the most natural and least processed of the bars out there...
Their list of flavors sound soo enticing -- banana cookie, key lime pie, chocolate coconut chew, peanut butter cookie, banana bread, coconut cream, cashew cookie, ginger snap, cocoa mole, pecan pie, tropical fruit tart.
I found them at my local Trader Joe's and bought all the flavors available - Apple Pie, Peanut Butter Cookie, and Cherry Pie.
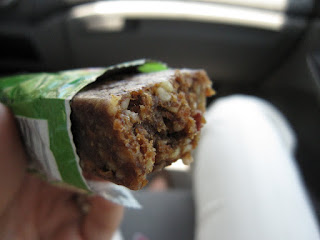
The Apple Pie Larabar is made of dates, walnuts, unsweetened apples, almonds, raisins, and cinnamon. That's it!! Out of the three, this was my favorite. It is somewhat reminiscent of apple pie. The nice thing about these bars is that they are not overly sweet. It has a good chewy yet crunchy texture. Each bite, you taste a little cinnamon, apples and get the crunch from the nuts. It leaves a slightly strange aftertaste in my mouth but nonetheless, quite satisfying.
After the Apple pie, I like the Cherry Pie Larabar. People seem to rave that it tastes exactly like cherry pie. I'm not so sure about that, but it was pretty good. There's something about dried cherries that I have never loved nor will I go out of my way to buy real cherry pie, so it is not for me. I probably would not buy this again but I think it is just out of personal preference for not loving cherry pie. (i love fresh cherries though!!)
My least favorite was the Peanut Butter Cookie Larabar. (Peanut butter cookie larabar lovers, don't get too upset because I know how passionate some of you are of this flavor! heehee) I waited till I was craving peanut butter to try this bar (I have to be in the mood for peanut flavored foods). This bar was just weird for me. The flavor of the dates mixed with the peanuts was just not my thing. It just didn't taste like a peanut butter cookie to me.
Overall, Larabars are good snacks. I thought that I would fall head over heels over these bars based on the reviews. But, I didn't. I think for the bars of their kind, they are really good though. It is a a great healthy pick-me up snack since the ingredients are au-natural and it is not super sweet. I'm still going to try as many flavors as I can get my hands on so I'll share those reviews with you as I try each one. Overall, if I was going to recommend one flavor, it would be Apple Pie for now. :)
Labels:
apple pie,
cherry pie,
larabars review,
peanut butter cookie,
snack
Monday, September 14, 2009
Smores Recipe without the campfire
I was reading through some food blogs yesterday and I stumbled across a fantastic food blog Savory Sweet Life through the Foodie Blogroll. I was scanning through some of her recipes and saw a picture of SMORES. OOOOH. I LOOOVE SMORES. And it looked AMAZING and wonderfully simple. You know what? Its almost better than campfire smores because the chocolate actually melts (rather than Hershey bars that never melt enough at the campfire), Obviously its missing the whole bonfire, sitting out at night under the stars, roasting marshmallows on a stick, blowing it out as it catches on fire and burning it to a crisp despite how rapidly you turn it experience...but thats why I said its only almost better :). The recipe is exactly like hers except with a few minor modifications, although its worth mentioning that hers looks way more beautiful!). Next time, I think I'll try the miniature marshmallows instead and the chocolate chips.
Smores Cookies
100% Inspired by:www.savorysweetlife.com
Ingredients
Graham Crackers
Ghiradelli Milk Chocolate
Marshmallows (i used the large)
Directions:
1. Assemble graham crackers on aluminum foil (or lined cookie sheet)
2. If using big marshmallows, place one per graham cracker. (If using miniature marshmallows, then spread a bunch across the graham crackers that are closely lined together)
3. Lay a small piece of milk chocolate on each marshmallow
4. Use toaster oven or regular oven and broil it for about 8-10 minutes. Watch carefully so you don't burn it. (I like my marshmallows slightly burnt so I kept it closer to 10 minutes.)
5. Remove from toaster oven and top with remaining graham cracker
6. Imagine yourself at a campfire sitting under the stars while enjoying the chocolatey ooey gooey crispy burnt marshmallow goodness
Here is the link to the original recipe: savory sweet life smores cookie recipe
Labels:
cookies,
recipe,
savory sweet life,
smores
Sunday, September 13, 2009
Thin Crust Pizza Lovers Recipe
I am a HUGE fan of thin crust pizzas. I'm not a deep-dish, dominos type of pizza fan. I love hearing that crunch when I bite into a thin crust.
When we were in Rome, we went to this restaurant near the opera and ordered a pizza for a snack. My husband said that it was the best pizza he ever ate. What I noticed was that the crust seemed like it was made from a pita bread or something really thin to create the crispiness that my husband enjoyed so much. Of course, I wanted to try and recreate it at home, so here is the recipe that I came up with. It is definitely crispier than the average thin crust..its almost a cracker crunch consistency.
Thin Crust Pizza Lovers Recipe
Ingredients
Trader Joe's Pesto (Fresh, not jarred)
Trader Joe's Lavash Bread
Grape tomatoes
Cremini mushrooms (I used Trader Joe's)
Bag of fresh spinach
Feta Cheese
Trader Joe's applewood smoked bacon
Mozarrella cheese shredded
Sliced fresh basil
Garlic
Olive Oil
(in fact, everything I purchased was from TJ's. I LOVE trader joe's!!!)
Directions
1, Preheat oven to 350 degrees
2. Brush on olive oil onto the tops of the lavash bread
3. Bake lavash bread for 2 minutes or so (slighty crispy)
4. Take out lavash bread and let cool
5. In a pan, roast the tomatoes for about 10 minutes with a little olive oil, salt, pepper, garlic powder
6. Fry bacon in pan until crispy. Place bacon onto paper towel to soak up oil.
7. Use same pan and saute the cremini mushrooms in the bacon fat. Season with salt after the mushrooms are cooked. Drain the water secreted from the mushrooms
8. Saute spinach in garlic and a little olive oil. Season with salt. Drain spinach water.
9. Spread a thin layer of pesto over the lavash bread
10. Sprinkle the pizza with the drained mushrooms, spinach, bacon, and tomatoes
11. Sprinkle with feta cheese and mozarrella cheese
12. Bake until cheese melted
13. Remove from oven and sprinkle with basil
14. Enjoy (crunch crunch crunch)
Obviously, you can add or eliminate any ingredients that you don't like...for example you can leave out the bacon and just have a vegetarian pizza which is quite yummy!! Hope you like the recipe!
Tuesday, September 8, 2009
Bouchees Bistro Review - Long Beach
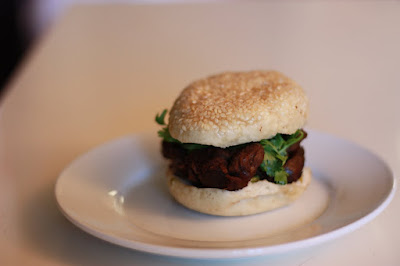
Are you craving sliders? This is an awesome place for sliders. Forget Burger King!
Bouchees Bistro is a fun restaurant that makes delicious sliders. As I was writing this entry, I was thinking that I needed to visit this place again for some tummy satisfaction. But, I just called them and apparently, they are moving to Pine and Broadway in Long Beach (a few blocks away) and will REOPEN in 2-3 WEEKS. The current location is turning into a taco place! Anyways, if you are tempted to try their sliders after reading this entry, do not fret! only a few weeks to wait...
The great thing about this place is that you can design your own slider. They have 4 base meats (angus sirloin beef - $3, turkey tenderloin $3, ahi tuna $4, and organic veggie $3). Then they often have a special - the last time I was there I had wild boar. For $3, you make a slider with a base meat, then you can add up to 4 toppings (lettuce, sliced red onion, carmelized onion, fresh tomato slices, oven roasted tomato, jalapeno salsa, garlic pickes, roasted red bell peppers) and a sauce (peppercorn dijonnaise, lemon caper aioli, spicy chili garlic sauce, homemade ketchup, buttermilk ranch, mayo, smoked jalapeno sauce, djon mustard, mesquite barbecue). If you want to add cheese, you can pay 50 cents (cheddar, pepperjac, gruyere, american, roquefort, feta, smoked gouda) or add premium toppings for 50 cents (avocado, bacon, shitake mushrooms). I usually order 2-3 sliders and am satisfied.
The angus sirloin and the wild boar burger meat are sooo delicious and flavorful and juicy. Its served on a toasted sesame bun loaded with all the fun toppings you choose. I have loved every combination that I've created. Bouchees also has pre-designed burgers for the decision-challenged. haha. They are definitely famous for their garlic sauce so try at least one burger with that sauce. Then, order a side of their crispy savory parmesan and herb french fries (sweet potatoes). Ugggh sooo goooood. Finish it off with an ice cold glass of coke. Happiness.
Location: WILL BE MOVING TO NEW ADDRESS in LONG BEACH
Website: http://www.bouchees.com/index.html
Monday, September 7, 2009
Accepted to the Foodie Blogroll!
Yipee! Just wanted to share the exciting news with all of you that my blog has been accepted to join the Foodie Blogroll! Its a great website that links you to other foodie blogs, so hopefully my website will gain more exposure, along with the possibility of winning some prizes! Awesome! Click the link on the bottom right if you're interested in browsing other food blogs :)
Tuesday, September 1, 2009
Breaded Chicken with Roasted Corn, Roasted Tomatoes, and Spinach Recipe
Whipped up this quick creation for the first time tonight. I had some leftover tomatoes and corn on the cob from a barbecue this weekend. I loved the flavor combination because of the sweetness of the corn, the tanginess of the tomatoes, the lightness of the spinach, with the salty breaded chicken. Give it a try and let me know what you think!
Chicken with Roasted Corn, Tomatoes, and Spinach Recipe
Ingredients:
Chicken breasts (patted dry)
Flour
1-2 eggs
Italian Bread Crumbs
Grape tomatoes
Boiled Corn on the Cob
Spinach
Garlic
Olive Oil
For the roasted corn & roasted tomatoes
1. Put the grape tomatoes and the corn that has been shucked off the cob into a pan
2. Drizzle grape tomatoes and corn with olive oil. Season with salt and pepper.
3. Place pan into the oven or toaster oven at 375 degrees and roast until tomatoes have burst open (about 10-15 minutes)
For the breaded chicken
1. Pat the chicken breasts dry and gently season with salt/pepper
2. Set up a few pans or bowls. One with the flour, the second with the 1-2 eggs beaten, the third with the italian bread crumbs.
3. Dip the chicken breast in the flour. Tap off excess flour
4. Dip the chicken breast into the beaten eggs
5. Dip the chicken breast into the italian bread crumbs (coat well)
6. Either saute the chicken breast in olive oil or put it into the oven at 375. I sauteed it for a quicker dinner but oven works and probably healthier
7. Once chicken breast done, move to the side
For the sauteed spinach
1. In another pot, saute garlic in olive oil and add the spinach.
2. Season with salt and pepper. Drain off the excess water excreted by the spinach. Move to the side
Once you're ready to plate it..place the chicken breast on the bottom of the plate. Top with the spinach. Ladle the roasted corn and roasted tomatoes over the spinach and chicken breast. Wallah!! Easy dinner!! (clean up is a different story...)
Thasos Greek Island Grille Review - Santa Ana
During one of my rotations a little over a year ago, one of my attendings brought us to Thasos Greek Island Grille for lunch. It is a cute small Greek/Mediterranean restaurant across from South Coast Plaza. It is a rather inexpensive place where you can get pita bundles for only 4.95 (just the pita) or the pita bundle combo (my favorite because it comes with 2 awesome sides) for 7.95. About the same price as fast food but even better! You order at the counter and then pick your seat. I've come back repeatedly for lunch (bustling) and also for dinner (which can be somewhat romantic) because I enjoy the food at its great price :)
Admittedly, I haven't been too adventurous every time I eat there. I always get the same 2-3 dishes everytime I go there and maybe mix up the sides (WOH! haha!) Generally, I either get the gyro pita bundle combo or the lamb souvlaki pita bundle combo. The gyro pita bundle combo comes with a decent amount of gyro meat, toasty thick pita bread which I love, topped with chopped romaine lettuce/tomatoes/green onions/red onions drizzled with their tzatziki sauce. As for the sides, I always get their Island Fries (which are CRISPY and seasoned with YUMMINESS!). Then I flip between either getting their Salad (which has romaine, olives, feta, tomatoes, onions with dressings such as balsamic or a lemon basil dressing!!) or their Mediterranean Slaw (i can't remember whats in it other than lots of cabbage dressed in their creamy balsalmic dressing). When I'm craving some lamb, I'll order the lamb souvlaki pita bundle combo. The only downside to this particular dish is that they always overcook the lamb (and steak). It should be pink in the middle in my opinion, which would maintain its tenderness. Its overcooked, so it can be a bit tough for chewing. Buut, nevertheless, I still occasionally order it and ask them to make it more medium rare....It is still never really a true medium rare and is usually overcooked, but at least its a little better than well done. Overall, a great place to go for a quick inexpensive bite to eat for lunch or dinner if you're craving greek/mediterranean and don't want Daphne's.
Location:
Thasos-Greek Island Grille
3940 S. Bristol St, Suite 113
Santa Ana, CA
Staff: Super friendly
Website: http://www.thewholepita.com/ourrestaurant.html
Labels:
gyros,
santa ana,
thasos,
thasos greek island grille
Thursday, August 27, 2009
Curry Corn Chowder - Recipe
A week or two ago, I posted about this Curry Corn Chowder that I loved at the Oxford House Inn in Maine. I decided to try and recreate this dish. Its not exactly perfect yet, but it was still enjoyable and worth trying if you love corn chowder and the flavor of curry.
2 strips of bacon
1 box of chicken broth
1 bag of frozen corn
1 teaspoon of curry powder
1 teaspoon of tumeric powder
1 chopped onion
2 handful of potatoes
2 tbsp butter
1/4 cup of flour mixed with a little water
little basil for garnish
(can consider adding heavy cream. many chowders have heavy cream or half and half. I thought it was creamy enough so I didn't add any.)
Curry Corn Chowder with Bacon (Inspired by Oxford House Inn)
1. Fry the bacon until crispy. Set aside on a plate with a napkin to soak up the oil.
2. Use the bacon oil and fry the chopped onion with the 2 tbsp butter. Onions should become translucent
3. Add the 1/4 cup of flour mixed with a little water into the onions (cook for few more minutes)
4. Add 1 tsp curry powder and 1 tsp tumeric powder
5 Add in chicken stock and bring to a boil
6. Add about 2 handfuls of peeled potatoes to the stock and cook for 10-15 minute or so till the potatoes are soft/cooked
7. Add corn into pot and boil for a few more minutes
8. Use hand blender to make it into a thick chunky soup
Spoon into bowl. Sprinkle with the thick crispy bacon. Garnish with a touch of basil. (Or, even better, if you have some basil oil, put the basil oil into a squirt bottle and put a little swirl on top of the soup for an even greater presentation effect)
Let me know if you like it! Do you think it needs more heat (spice) ? :)
Monday, August 24, 2009
Plum's Cafe Review for Brunch - Costa Mesa
Plum's Cafe is this great place tucked away in a strip mall that I discovered a few years ago. On weekends, the place is packed, and rightfully so. It is one of the best brunch places that I have been to in SoCal. Its a bustling environment filled with indoor seating (where you can appreciate awesome local artwork) and outdoor seating. I have tried a myriad of things at Plum's and have always been generally satisfied.
Some of my favorite dishes include the Raspberry Pancakes with an Orange Marscapone Cream, Coconut French Toast with Fresh Strawberries/Papayas/Bananas with Orange Butter and Maple Syrup, Oregon Pepper Bacon, Alderwood Smoked Salmon Hash, and the Santa Fe Eggs Benedict.
The Raspberry Pancakes are a must-try, at least once, since it is not your typical pancake with only fresh fruit and maple syrup. The pancakes are fluffy and layered with fresh raspberries and drizzled with a raspberry sauce...but the real kicker is the marscapone sauce they use that is melted all over the warm pancakes. Okay, who does not love marscapone? (think tiramisu)...It is this creamy, sweetened wonder that feels like your eating a decadent dessert. Oolala. Have it with a cappuccino or a coffee to balance the sweetness and you're practically in heaven.
The Alderwood Smoked Salmon Hash is also really wonderful. You basically have this giant hearty plate of breakfast potatoes/peppers/onion hash with pieces of smoked salmon that is slightly cooked as it sits on warm hash as well as 2 poached eggs (one of my favorite ways to eat eggs) gently covered in a hollandaise sauce. You break into the poached egg and the yolk slowly but surely oozes onto the potatoes! Yumm! The smoked salmon is a slightly fishy but has a great smoked flavor as well as a hint of some acidity (which I love). Ok, now I'm getting really hungry thinking about it....
Some of the other things I've tried, but did not love as much was the Cheddar and Chive popover (probably ruined by the Jordan Pond popover experience I reviewed earlier) and the French Rolled Omelette (a little bland for me....).
All in all, a solid place for brunch and somewhere I will frequently return to eat...
Location:
Plum's Cafe
369 East 17th St
Costa Mesa, CA
Labels:
Breakfast,
Brunch,
Costa Mesa,
Pancakes,
Plum's Cafe,
Smoked Salmon
Subscribe to:
Posts (Atom)