Sunday, September 27, 2009

Chocolate Chai Cupcakes with a Cinnamon-Spiced Vanilla Buttercream Frosting


I had some candy corn the other day and it wistfully reminded me of the fall season and of the holidays. I was craving some cupcakes and had recently seen a recipe for Chai Cupcakes online somewhere. I didn't have actual chai tea and was feeling pseudo lazy (too lazy to search for a real recipe but still craving some chai like dessert). So, I searched my cupboards and came upon a box of chocolate cake mix. Chocolate? Chai? Weird..but...hey why not give it a try?? So I decided to randomly modify the chocolate mix and substitute a portion of the water with chai concentrate. I was initially going to replace all the water with the chai concentrate (tazo) but then halfway through, had some second thoughts because I was wondering if it would be too sweet. So I did half water, half concentrate.

I felt like the cupcakes were pretty good. Chai flavor was subtle...maybe too subtle. I'm not sure if I would make it again. But, I have to say that the people that ate it all seemed to really enjoy it, despite my mumbling that it was kinda weird tasting and that I would not be offended if they did not like it before handing them one. Maybe the frosting was the key in the success....

Frosting components: (I was low in powdered sugar as well). So I only used 1/2 stick butter and 1/2 cup of powdered sugar. 1 tablespoon of good vanilla extract, 1 tablespoon of cinnamon. Blended it in the mixer until a thick frosting. Smeared the frosting on the cooled cupcakes and topped with a candy corn to make it more holiday-esque.

If you're bored or looking for a new way to use your box mix...give it a try. My conclusion is that fresh frosting is SO much better than canned frosting AND.... I need to learn how to pipe frosting...hahaha.

Kimchi Fried Rice


Kimchi - love the taste but the smell that it leaves in your breath and in your refrigerator is another story. Kimchi is a korean side dish that is made from pickled cabbage. Its spicy and veeeerrry garlicky. (There are apparently different types and spices that can be used). Anyways, when I was in high school, a group of us would hang out at Korean friend's house with a fridge well stocked with kimchi. We would always know if the fridge was opened...people would start yelling--WHO OPENED THE FRIDGE? WHY DID YOU OPEN THE FRIDGE?! hahaha.. But, the taste, well..yum! I love it. Anyways, I went over to a friend's house one day and had kimchi fried rice for the first time (yay janice!). Delicious!

We had some left over kimchi in our fridge and figured it would go really well with this beef noodle tofu soup, so we decided to whip up a make-shift version of the kimchi fried rice. All you need is some leftover kimchi sliced up, leftover rice, onions (green +/- regular) and your well on your way...

Kimchi Fried Rice

Ingredients:
- White rice
- Onions (green or regular or both)
- Kimchi
- Soy sauce
- Bibimjang Red pepper paste
- Garlic


Instructions
1. Saute garlic in a little olive oil
2. Add onions (either green or yellow or both) and saute till translucent if using yellow onions. We added both.
3. We had some leftover beef strips from another meal so we threw it in. You can leave out the meat or add spam or thick ham or any leftover meat you have. Thats what's so great about this recipe. You can throw in leftovers!
4. Add the kimchi
5. Couple swirls of soy sauce and saute everything
6. Throw in leftover rice
7. Mix well
8. We added some Bibimjang-Seasoning Red pepper paste for some spice
9. For presentation, add a few sprigs of parsley or cilantro or green onions for more color.

If you want to have an egg pancake, here are the directions below. You could place it on top or below the rice.
1. Beat 5 eggs (for 4 people)
2. Add 3 tablespoons of water. Mix
3. Salt to taste
4. Pour into flat round pan. Let it fry until cooked. Flip once.

Voila! Kimchi Fried Rice. I'm craving some now...If only I could bring it to work...Ooo the evil looks I would get if I did...hahaha.

Sunday, September 20, 2009

Almond Crunch Pretzel Recipe


Have you ever tried Auntie Anne's Almond Crunch Pretzel? That is one of my all-time favorite pretzels. I also love just a classic pretzel dipped in yellow mustard. Pretzels are so expensive though. The other day, I walked into a Wetzel Pretzel shop and checked out the price of their Almond Crunch pretzel. Over 3 dollars. A little bit too expensive for my blood. And not to mention, I actually think that the Auntie Anne's almond crunch is way better. So, my quest was to figure out how to make this pretzel. Part of this recipe is adapted from CD kitchen for the pretzel base recipe and then I created the almond crunch based on how I think it could possibly be made. If there are some experts out there, any info to correct me would be great! :)

Almond Crunch Pretzel Recipe

Ingredients:
2 T brown sugar
1 1/2 cup warm water
1 1/8 teaspoon yeast
1 1/8 teaspoon kosher salt
1 cup wheat flour
3 cups regular flour
2 cups warm water
2 T baking soda
Few spoonfuls of brown sugar
Ground toasted almonds

Instructions
1. Add 2 T brown sugar to 1 1/2 cup warm water into mixer bowl. Mix to dissolve
2. Add 1 1/8 teaspoon yeast and 1 1/8 teaspoon salt to sugar/water mix. Mix to dissolve. Wait a few minutes
3. Add mixture to 3 cups flour and 1 cup of wheat flour
4. Knead dough using mixer (or hands if you don't have a mixer) to a smooth consistency
5. Let dough rise for at least 30 minutes (I waited for a little more than an hour) or until double in size. I covered the mixing bowl with a wet paper towel (without it touching the dough itself)
6. Greased cookie sheet
7. Mixed 2 cups of warm water and 2 T baking soda in a large bowl. Mix frequently
8. Split dough into equal parts (depending how big you want your pretzels).
9. Roll into 1/2 inch twists
10. Twist into a pretzel
11. Place into baking soda bath water. Cover entire pretzel with soda bath water


12. Place onto cooking sheet
13. Let pretzel rise again


14. Bake in 450 degree oven for 7 minutes
15. While baking, melt a few teaspoons of brown sugar with a little water to create a brown sugar mixture
16. Chop/grind toasted almonds
17. Once brown sugar mixture somewhat cooled, mix in grinded toasted almonds
18. At 7 minutes, pull out pretzels and brush with an egg wash. Then add the brown sugar mixture with almonds and brush onto the pretzel


19. Place back into oven for another 3 minutes
20. Remove pretzels and enjoy the crunchy sweet pretzel

If you want regular salty pretzels...instead of adding the brown sugar/almond topping, just brush with the egg wash and bake for another 3 minutes. Remove from oven. Brush with melted butter. Sprinkle with kosher salt or pretzel salt. Dip into yellow or dijon mustard. Yummers!

For packaging idea: Rip some parchment paper. Fold in half. Tape up 2 of the remaining sides. Leave opening. Slip cooled pretzel for a makeshift pretzel bag.

Mom's Chinese Green Onion Sesame Buns (Sao Bing)


My mom makes these Chinese Green Onion Sesame buns on occasion and I love it when she does! For all of you Chinese people out there, the buns are my mom's version of Sao Bing (my own personal phonetics). We typically eat this for breakfast/brunch with a bowl of soupy rice and a bunch of sides. You can fill it with Chinese braised meat (loo niew zho) or these fried crueller sticks (yo tiao). Yummmm....

Chinese Green Onion Sesame Buns (Sao Bing)

Ingredients:
2 T. yeast
2 T. sugar
1 cup warm water
1 cup extra water
6 cups flour
2-3 bunches of green onions
Olive oil
1 beaten egg
Sesame Seeds

Instructions
1. Mix 2 T yeast, 2 T sugar, and 1 cup warm water together
2. Let rest till mixture bubbles up + rises


3. Add it to 6 cups of flour in mixer bowl
4. Add remaining cup of water to yeast mixture (so none is wasted), then add to mixer bowl (thus total of 2 cups water in mixer bowl)


5. Use mixer - Mix until dough is certain consistency


6. Cover mixer with wet paper towel (not onto the dough itself) and let the dough rest. Dough will rise about double in size
7. Mix dough again (will collapse)
8. Let dough rise again until back to double its size


9. Chop 2-3 bunches of green onions
10. Add about 1-2 T of olive oil (to generously coat the green onions)
11. Season green onions with about 1 teaspoon of salt (or to your liking)
12. Flour board
13. Take dough and split into equal parts
14. Using rolling pin, roll flat (edges should be thinner)
15. Add green onions into center


16. Fold into pocket


17. Add egg wash to top of pocket
18. Dip into sesame seeds


19. Place onto plate or baking sheet


20. Gently heat cooking pot and coat bottom pot with olive oil (low-medium heat)
21. Place sesame side of bun down into oil and fry until slightly golden
22. Flip bun onto other side
23. Add approximately cup of water to bottom of pot (water about 1/2 way up buns to sort of steam the buns).
23. Carefully watch until water boils off and bottom of bun is golden brown as well
24. Flip again in pot one more time if you want the top to be slightly crispy
25. Remove from heat and allow the buns to slightly cool down (but still warm)

26. Slice bun in half and fill with braised meat or whatever you would like
27. If using braised meat, add a few sprigs of parsley and sliced raw green onion


I will post the braised meat recipe at a later date. If it sounds too difficult, try to go to a dimsum place or an authentic Chinese restaurant on a weekend morning since they may serve something like it! :)

Isn't home cooked meals from mom the best? Chinese food is actually amazingly diverse and so delicious. Its not usually Kung Pao Chicken, Orange Chicken, or Chicken and Broccoli that most people think of when they want Chinese food. The Chinese food I eat at home is completely different! Truthfully, I occasionally will crave me a little Panda Express. But thats because most Chinese people do not make that type of food at home. At home, I'm eating homemade dumplings, delicious braised meats, noodle soups, buns, all differently flavored foods...

If I had one piece of advice that I'm trying to do now (wish I didn't wait this long!!), if you can, is to learn from your mom how she cooks and what she cooks since she has a wealth of experience, knowledge and recipes!! My goal is to learn how to cook more authentic Chinese food since that is one of my favorite foods. I want to be able to share this with my future kids and to expose their palates to the wonderful flavors of Chinese cooking.

Thursday, September 17, 2009

LaraBar Product Review - Cherry Pie, Peanut Butter Cookie, and Cherry Pie

I was watching Food Network one day and saw them featuring Lara Bars. I'm always looking for bars that I can snack on at work so I was excited. Larabar's are made of unsweetened fruits, nuts and spices and are gluten/dairy/soy free with no added sugar. They are mostly date based...so if you're not a fan of dates, this may not be the bar for you, although, it is not overpowering so worth a try. They seem the most natural and least processed of the bars out there...

Their list of flavors sound soo enticing -- banana cookie, key lime pie, chocolate coconut chew, peanut butter cookie, banana bread, coconut cream, cashew cookie, ginger snap, cocoa mole, pecan pie, tropical fruit tart.

I found them at my local Trader Joe's and bought all the flavors available - Apple Pie, Peanut Butter Cookie, and Cherry Pie.

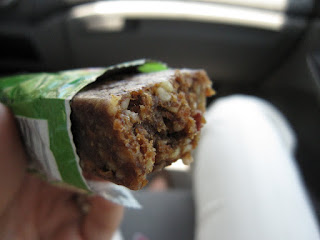
The Apple Pie Larabar is made of dates, walnuts, unsweetened apples, almonds, raisins, and cinnamon. That's it!! Out of the three, this was my favorite. It is somewhat reminiscent of apple pie. The nice thing about these bars is that they are not overly sweet. It has a good chewy yet crunchy texture. Each bite, you taste a little cinnamon, apples and get the crunch from the nuts. It leaves a slightly strange aftertaste in my mouth but nonetheless, quite satisfying.

After the Apple pie, I like the Cherry Pie Larabar. People seem to rave that it tastes exactly like cherry pie. I'm not so sure about that, but it was pretty good. There's something about dried cherries that I have never loved nor will I go out of my way to buy real cherry pie, so it is not for me. I probably would not buy this again but I think it is just out of personal preference for not loving cherry pie. (i love fresh cherries though!!)

My least favorite was the Peanut Butter Cookie Larabar. (Peanut butter cookie larabar lovers, don't get too upset because I know how passionate some of you are of this flavor! heehee) I waited till I was craving peanut butter to try this bar (I have to be in the mood for peanut flavored foods). This bar was just weird for me. The flavor of the dates mixed with the peanuts was just not my thing. It just didn't taste like a peanut butter cookie to me.

Overall, Larabars are good snacks. I thought that I would fall head over heels over these bars based on the reviews. But, I didn't. I think for the bars of their kind, they are really good though. It is a a great healthy pick-me up snack since the ingredients are au-natural and it is not super sweet. I'm still going to try as many flavors as I can get my hands on so I'll share those reviews with you as I try each one. Overall, if I was going to recommend one flavor, it would be Apple Pie for now. :)

Monday, September 14, 2009

Smores Recipe without the campfire


I was reading through some food blogs yesterday and I stumbled across a fantastic food blog Savory Sweet Life through the Foodie Blogroll. I was scanning through some of her recipes and saw a picture of SMORES. OOOOH. I LOOOVE SMORES. And it looked AMAZING and wonderfully simple. You know what? Its almost better than campfire smores because the chocolate actually melts (rather than Hershey bars that never melt enough at the campfire), Obviously its missing the whole bonfire, sitting out at night under the stars, roasting marshmallows on a stick, blowing it out as it catches on fire and burning it to a crisp despite how rapidly you turn it experience...but thats why I said its only almost better :). The recipe is exactly like hers except with a few minor modifications, although its worth mentioning that hers looks way more beautiful!). Next time, I think I'll try the miniature marshmallows instead and the chocolate chips.

Smores Cookies
100% Inspired by:www.savorysweetlife.com

Ingredients
Graham Crackers
Ghiradelli Milk Chocolate
Marshmallows (i used the large)

Directions:
1. Assemble graham crackers on aluminum foil (or lined cookie sheet)
2. If using big marshmallows, place one per graham cracker. (If using miniature marshmallows, then spread a bunch across the graham crackers that are closely lined together)
3. Lay a small piece of milk chocolate on each marshmallow


4. Use toaster oven or regular oven and broil it for about 8-10 minutes. Watch carefully so you don't burn it. (I like my marshmallows slightly burnt so I kept it closer to 10 minutes.)


5. Remove from toaster oven and top with remaining graham cracker
6. Imagine yourself at a campfire sitting under the stars while enjoying the chocolatey ooey gooey crispy burnt marshmallow goodness

Here is the link to the original recipe: savory sweet life smores cookie recipe

Sunday, September 13, 2009

Thin Crust Pizza Lovers Recipe

I am a HUGE fan of thin crust pizzas. I'm not a deep-dish, dominos type of pizza fan. I love hearing that crunch when I bite into a thin crust.

When we were in Rome, we went to this restaurant near the opera and ordered a pizza for a snack. My husband said that it was the best pizza he ever ate. What I noticed was that the crust seemed like it was made from a pita bread or something really thin to create the crispiness that my husband enjoyed so much. Of course, I wanted to try and recreate it at home, so here is the recipe that I came up with. It is definitely crispier than the average thin crust..its almost a cracker crunch consistency.


Thin Crust Pizza Lovers Recipe

Ingredients
Trader Joe's Pesto (Fresh, not jarred)
Trader Joe's Lavash Bread
Grape tomatoes
Cremini mushrooms (I used Trader Joe's)
Bag of fresh spinach
Feta Cheese
Trader Joe's applewood smoked bacon
Mozarrella cheese shredded
Sliced fresh basil
Garlic
Olive Oil
(in fact, everything I purchased was from TJ's. I LOVE trader joe's!!!)

Directions
1, Preheat oven to 350 degrees
2. Brush on olive oil onto the tops of the lavash bread
3. Bake lavash bread for 2 minutes or so (slighty crispy)
4. Take out lavash bread and let cool
5. In a pan, roast the tomatoes for about 10 minutes with a little olive oil, salt, pepper, garlic powder
6. Fry bacon in pan until crispy. Place bacon onto paper towel to soak up oil.
7. Use same pan and saute the cremini mushrooms in the bacon fat. Season with salt after the mushrooms are cooked. Drain the water secreted from the mushrooms
8. Saute spinach in garlic and a little olive oil. Season with salt. Drain spinach water.
9. Spread a thin layer of pesto over the lavash bread
10. Sprinkle the pizza with the drained mushrooms, spinach, bacon, and tomatoes
11. Sprinkle with feta cheese and mozarrella cheese
12. Bake until cheese melted
13. Remove from oven and sprinkle with basil
14. Enjoy (crunch crunch crunch)

Obviously, you can add or eliminate any ingredients that you don't like...for example you can leave out the bacon and just have a vegetarian pizza which is quite yummy!! Hope you like the recipe!

Tuesday, September 8, 2009

Bouchees Bistro Review - Long Beach

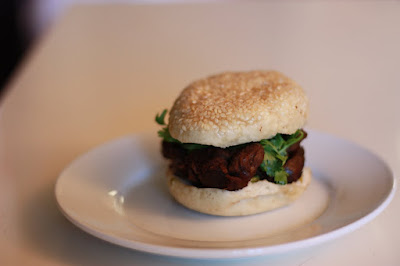
Are you craving sliders? This is an awesome place for sliders. Forget Burger King!
Bouchees Bistro is a fun restaurant that makes delicious sliders. As I was writing this entry, I was thinking that I needed to visit this place again for some tummy satisfaction. But, I just called them and apparently, they are moving to Pine and Broadway in Long Beach (a few blocks away) and will REOPEN in 2-3 WEEKS. The current location is turning into a taco place! Anyways, if you are tempted to try their sliders after reading this entry, do not fret! only a few weeks to wait...

The great thing about this place is that you can design your own slider. They have 4 base meats (angus sirloin beef - $3, turkey tenderloin $3, ahi tuna $4, and organic veggie $3). Then they often have a special - the last time I was there I had wild boar. For $3, you make a slider with a base meat, then you can add up to 4 toppings (lettuce, sliced red onion, carmelized onion, fresh tomato slices, oven roasted tomato, jalapeno salsa, garlic pickes, roasted red bell peppers) and a sauce (peppercorn dijonnaise, lemon caper aioli, spicy chili garlic sauce, homemade ketchup, buttermilk ranch, mayo, smoked jalapeno sauce, djon mustard, mesquite barbecue). If you want to add cheese, you can pay 50 cents (cheddar, pepperjac, gruyere, american, roquefort, feta, smoked gouda) or add premium toppings for 50 cents (avocado, bacon, shitake mushrooms). I usually order 2-3 sliders and am satisfied.

The angus sirloin and the wild boar burger meat are sooo delicious and flavorful and juicy. Its served on a toasted sesame bun loaded with all the fun toppings you choose. I have loved every combination that I've created. Bouchees also has pre-designed burgers for the decision-challenged. haha. They are definitely famous for their garlic sauce so try at least one burger with that sauce. Then, order a side of their crispy savory parmesan and herb french fries (sweet potatoes). Ugggh sooo goooood. Finish it off with an ice cold glass of coke. Happiness.

Location: WILL BE MOVING TO NEW ADDRESS in LONG BEACH
Website: http://www.bouchees.com/index.html

Monday, September 7, 2009

Accepted to the Foodie Blogroll!

Yipee! Just wanted to share the exciting news with all of you that my blog has been accepted to join the Foodie Blogroll! Its a great website that links you to other foodie blogs, so hopefully my website will gain more exposure, along with the possibility of winning some prizes! Awesome! Click the link on the bottom right if you're interested in browsing other food blogs :)

Tuesday, September 1, 2009

Breaded Chicken with Roasted Corn, Roasted Tomatoes, and Spinach Recipe


Whipped up this quick creation for the first time tonight. I had some leftover tomatoes and corn on the cob from a barbecue this weekend. I loved the flavor combination because of the sweetness of the corn, the tanginess of the tomatoes, the lightness of the spinach, with the salty breaded chicken. Give it a try and let me know what you think!

Chicken with Roasted Corn, Tomatoes, and Spinach Recipe

Ingredients:
Chicken breasts (patted dry)
Flour
1-2 eggs
Italian Bread Crumbs
Grape tomatoes
Boiled Corn on the Cob
Spinach
Garlic
Olive Oil

For the roasted corn & roasted tomatoes
1. Put the grape tomatoes and the corn that has been shucked off the cob into a pan
2. Drizzle grape tomatoes and corn with olive oil. Season with salt and pepper. 
3. Place pan into the oven or toaster oven at 375 degrees and roast until tomatoes have burst open (about 10-15 minutes)

For the breaded chicken
1. Pat the chicken breasts dry and gently season with salt/pepper
2. Set up a few pans or bowls. One with the flour, the second with the 1-2 eggs beaten, the third with the italian bread crumbs.
3. Dip the chicken breast in the flour. Tap off excess flour
4. Dip the chicken breast into the beaten eggs
5. Dip the chicken breast into the italian bread crumbs (coat well)
6. Either saute the chicken breast in olive oil or put it into the oven at 375. I sauteed it for a quicker dinner but oven works and probably healthier 
7. Once chicken breast done, move to the side

For the sauteed spinach
1. In another pot, saute garlic in olive oil and add the spinach. 
2. Season with salt and pepper. Drain off the excess water excreted by the spinach. Move to the side

Once you're ready to plate it..place the chicken breast on the bottom of the plate. Top with the spinach. Ladle the roasted corn and roasted tomatoes over the spinach and chicken breast. Wallah!! Easy dinner!! (clean up is a different story...)


Thasos Greek Island Grille Review - Santa Ana


During one of my rotations a little over a year ago, one of my attendings brought us to Thasos Greek Island Grille for lunch. It is a cute small Greek/Mediterranean restaurant across from South Coast Plaza. It is a rather inexpensive place where you can get pita bundles for only 4.95 (just the pita) or the pita bundle combo (my favorite because it comes with 2 awesome sides) for 7.95. About the same price as fast food but even better! You order at the counter and then pick your seat. I've come back repeatedly for lunch (bustling) and also for dinner (which can be somewhat romantic) because I enjoy the food at its great price :)

Admittedly, I haven't been too adventurous every time I eat there. I always get the same 2-3 dishes everytime I go there and maybe mix up the sides (WOH! haha!) Generally, I either get the gyro pita bundle combo or the lamb souvlaki pita bundle combo. The gyro pita bundle combo comes with a decent amount of gyro meat, toasty thick pita bread which I love, topped with chopped romaine lettuce/tomatoes/green onions/red onions drizzled with their tzatziki sauce. As for the sides, I always get their Island Fries (which are CRISPY and seasoned with YUMMINESS!). Then I flip between either getting their Salad (which has romaine, olives, feta, tomatoes, onions with dressings such as balsamic or a lemon basil dressing!!) or their Mediterranean Slaw (i can't remember whats in it other than lots of cabbage dressed in their creamy balsalmic dressing). When I'm craving some lamb, I'll order the lamb souvlaki pita bundle combo. The only downside to this particular dish is that they always overcook the lamb (and steak). It should be pink in the middle in my opinion, which would maintain its tenderness. Its overcooked, so it can be a bit tough for chewing. Buut, nevertheless, I still occasionally order it and ask them to make it more medium rare....It is still never really a true medium rare and is usually overcooked, but at least its a little better than well done. Overall, a great place to go for a quick inexpensive bite to eat for lunch or dinner if you're craving greek/mediterranean and don't want Daphne's.

Location:
Thasos-Greek Island Grille
3940 S. Bristol St, Suite 113
Santa Ana, CA

Staff: Super friendly
Website: http://www.thewholepita.com/ourrestaurant.html
Blog Widget by LinkWithin